Setting up and using MailWasher is relatively simple. MailWasher will immediately begin blocking spam using its default settings. After adding users (if users will be accessing quarantine digest reports), you may wish to add friends email addresses/domains to the whitelist to instantly allow friends emails through. Bayesian filtering is useful to allow MailWasher to learn which of your organizations email is good and which is spam based on spam reporting and rescued email.
By default a 30 day trial period is enabled after installation and is extended by using a license key. Please note, you do not need to enter a license key on the trial account screen (Settings>>License) during the trial.
The login screen is shown after setup at http://localhost:4044 or http://[companywebsite]:4044
Login with 'admin' as the username and your chosen password. 'password' is the default password if it has not been changed.

Out of the box MWES should block around 95% of spam
To increase this and filter the remaining spam read these steps
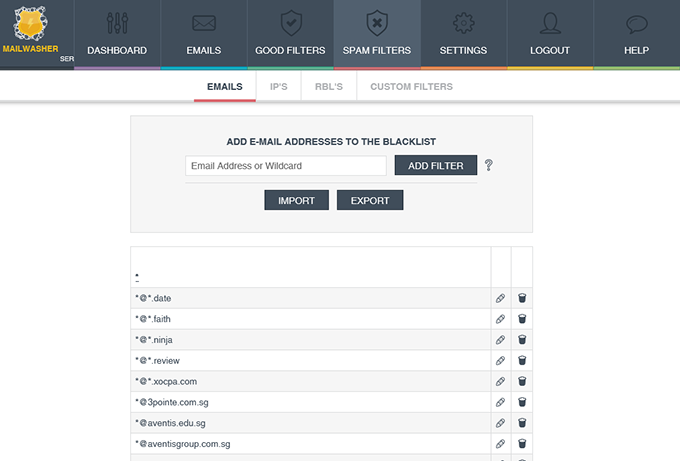
1. You may want to add common spam domains or FROM email addresses using wildcard patterns to the blacklist. These will become apparent over time. eg domains like *@*.ninja
2. You'll want to enable Bayesian Filtering. This type of filtering learns from emails you decide are good and bad and is the last filter to be used. It will mop up almost all remaining spam.
There's not too many reasons to use the Whitelist unless you're having issues receiving email from a user or domain. ie. Their server doesn't support Greylisting, or they've been added to external blacklists.
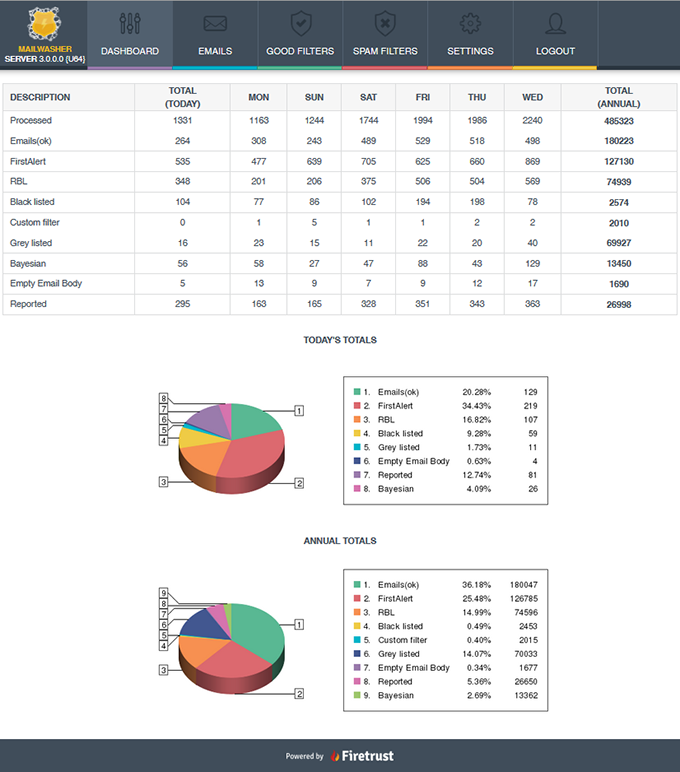
The monitor screen shows statistics of how mail is processed
Non deliverable message
Enable if you want to send a non-deliverable message back to the sender if an email is considered spam.
NOTE: You may want to disable the bounce message when training Bayesian Filters as initial false positives are likely.

Digest Reports
Users can be sent an email every X hours with a list of their quarantined email. The user can go through this list and rescue any email they want to unblock.
It may be best to avoid adding RBL's and FirstAlert to the digest as these catch a lot of spam and the digests will be very long and tedious to look through. See Setting up daily digests.

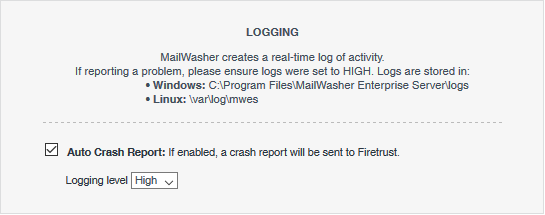
Logging
Useful for diagnostics as the logs are real-time. Set to High to get any useful information.
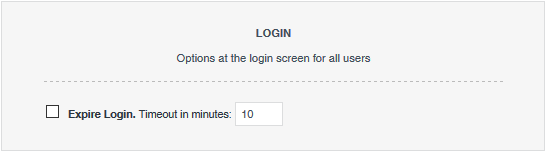
Login
The login screen can be set to expire after X minutes of inactivity.
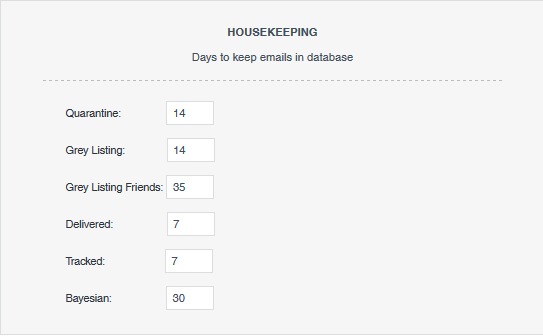
Housekeeping
These settings determine how long MWES will keep items in the database. It can be useful to reduce these if disk space is low.
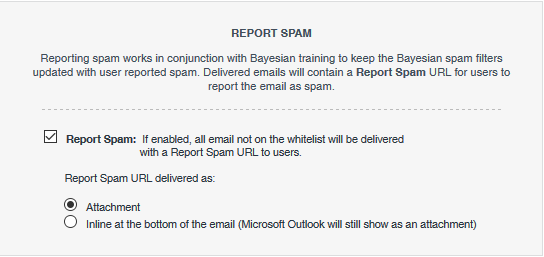
Report Spam
Users may wish to report spam. Reported spam is used to train the bayesian learning filters about which emails are spam.
A 'Report Spam' link is added as an attachment or added to the body of the email as a footer, although Microsoft Outlook users always have the Report Spam link added as an attachment.
The Report Spam link is added to all emails except where the email address is whitelisted.

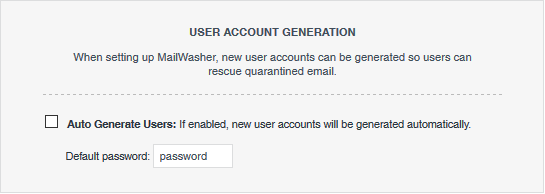
User Account Generation
If this is enabled, when an email is first received for a mailbox user (a mailbox user is first verified by the MTA),
MWES will automatically set that user up with a username and password (default: password) so the user will be able to login to view their quarantined spam.
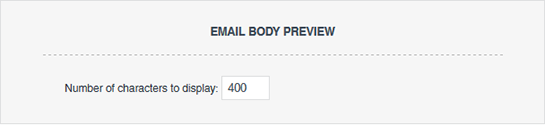
Email Body Preview
Change this to show how much of the body of an email is able to be previewed when hovering the mouse over an email in the Quarantine/All Emails areas.
The filter settings screen enables configuration of general settings related to filters.
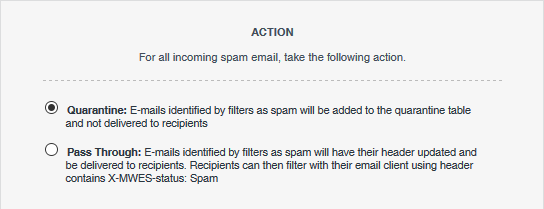
Action
Choose what happens to incoming email identified as spam.
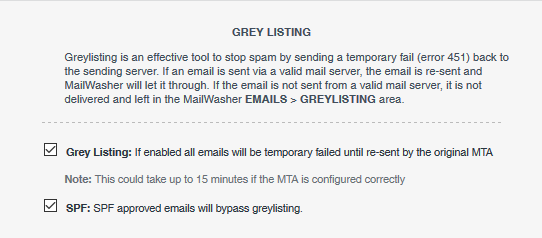
Grey Listing
When emails arrive and they're not whitelisted or have been let through before, a 'Please try again' message is sent back to the sender.
A legitimate and correctly setup MTA will re-send the email and it will be let through by MWES. This is useful to block spam sent by viruses as the email won't be re-sent.
A sending MTA may take up to 15 minutes to re-send the email, therefore it's useful to enable the SPF option as that will bypass greylisting for legitimate MTAs and speed up email deliverability.
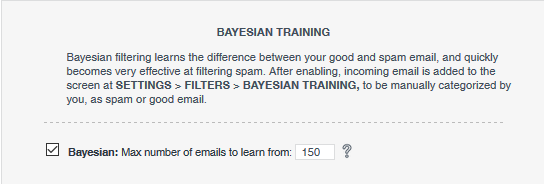
Bayesian Training
Bayesian filtering learns the difference between your good and spam email, and quickly becomes very effective at filtering spam. See Bayesian filters.
Clear Cache
MailWasher uses a cache of spam results to quickly catch new spam. If an email sender is continuously incorrectly categorized as spam (eg. from a rogue RBL result), clearing the cache will remove the entry from the cache.
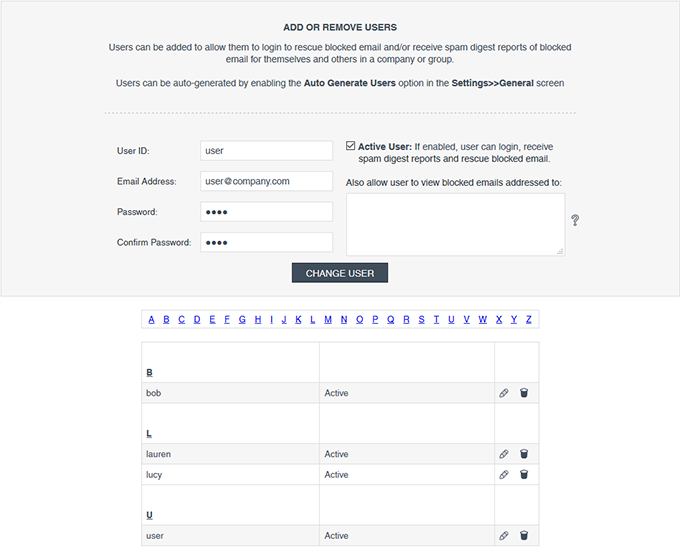
Adding users allows end-users access to the quarantine and greylisting screens via a web browser so they can view their blocked email and if necessary, rescue the blocked email so it is delivered to their inbox.
You'll need to decide if you want to enable:
Setup a global user login
If a user account is created with a username and password, but with no email address, that account becomes a global quarantine account and all users will use that same quarantine screen to search for their blocked email.
This approach might not be desirable for privacy reasons. One global user is setup (no email addresses are entered).
Anyone can search for their blocked email from the same Quarantine screen, search through all emails in the 'All Email' screen or look at and rescue delayed email in the Grey Listing screen.
Setup an individual user login
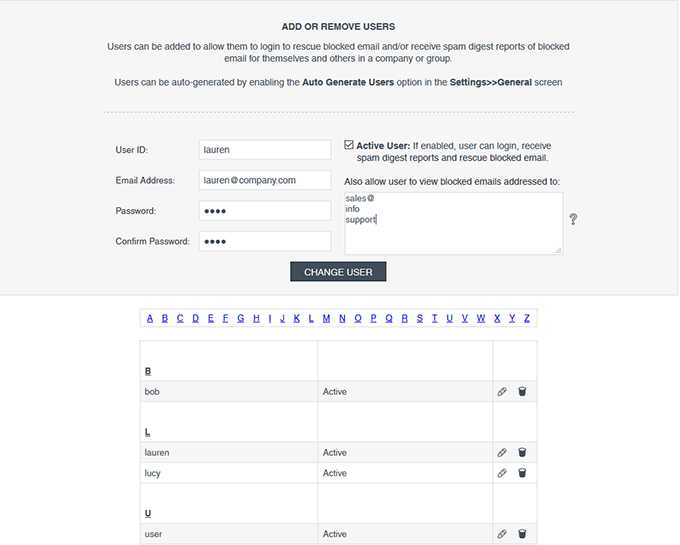
Individual user logins are created by creating a username and password, along with adding the users email address and a password.
When a user logs in to the quarantine area they will only be able to search for blocked email addressed to themselves, and optionally any other alias/email addresses in the Also allow user to view blocked emails addressed to: area.
User setup with aliases.
Individual User Account Login - User can view their quarantined email
Users can move their mouse over the subject line to view the body (first 200 characters by default - preview length can be changed in Settings >> General)
MWES can be setup to send digests of blocked email at certain time intervals. These digests list blocked email and the user can rescue any email from within the digest.
Digests look like this:
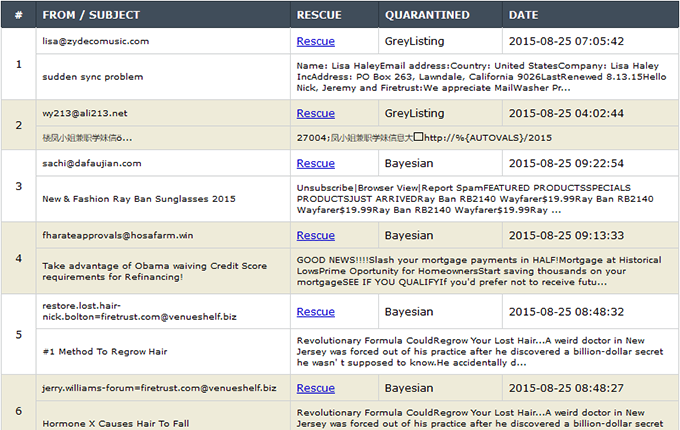
First, go to the Settings >> General screen, then down to Digest Report: and enable this. Select how often you want the digests to be delivered (digests are sent every X hours from when MWES is started), then select which spam tools you want to see blocked emails for.
There also needs to be a valid web hostname (URL or IP address) so external users can rescue emails from that web hostname. Set this up in Settings >> Setup >> System Configuration.
Note: It is recommended to select Greylisting and Bayesian as these are the spam tool most likely to catch legitimate email initially until they have been working a while. Also select Custom Filters, if you have entered any custom filters to check they are working correctly. FirstAlert and RBLs block a lot of spam, so you may want to avoid adding these to the digests as the digests will be very long and tedious to look through.
Next, you will need to setup your users to receive these digest reports.
Go to Settings >> Users and enter the user login details and their email address and check the box 'Active'. Add in any email address or aliases or part email address (each on a new line) for which the user wants to receive.
eg.
support
info@company.com
admin@
Add more users as required who need to receive digest reports.
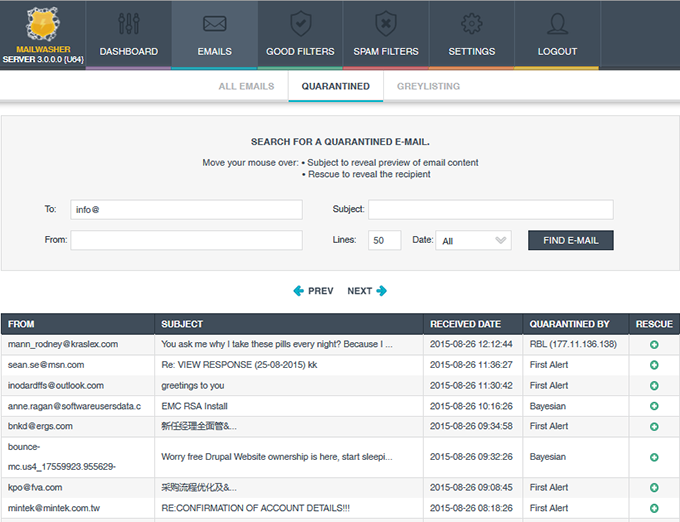
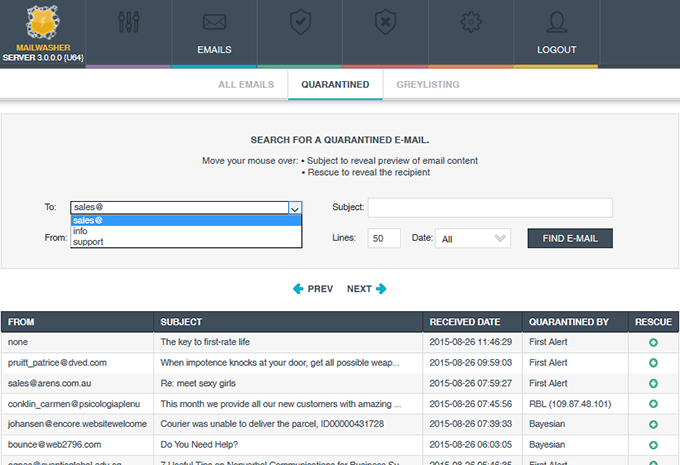
After login, you'll be taken to the Quarantine screen where you can search for emails and if necessary, rescue them. All rescued emails are sent to the original recipient.
This quarantine screen is available to the end-users via login to a web browser so they can search for blocked email using a number of search criteria:
By default, when a user logs in they will see the last 50 emails which have been blocked. They can either change the number of emails to view on one page, or move through the pages by clicking the 'Previous' or 'Next' links.
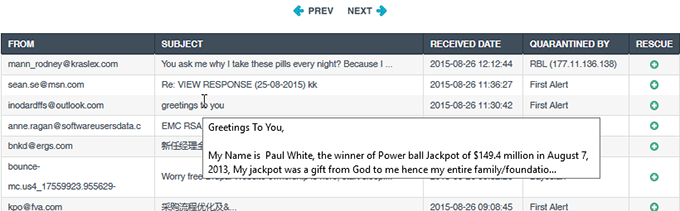
You can move the mouse over the subject line to view the body (first 200 characters by default - the preview lines can be changed in Settings >> General)
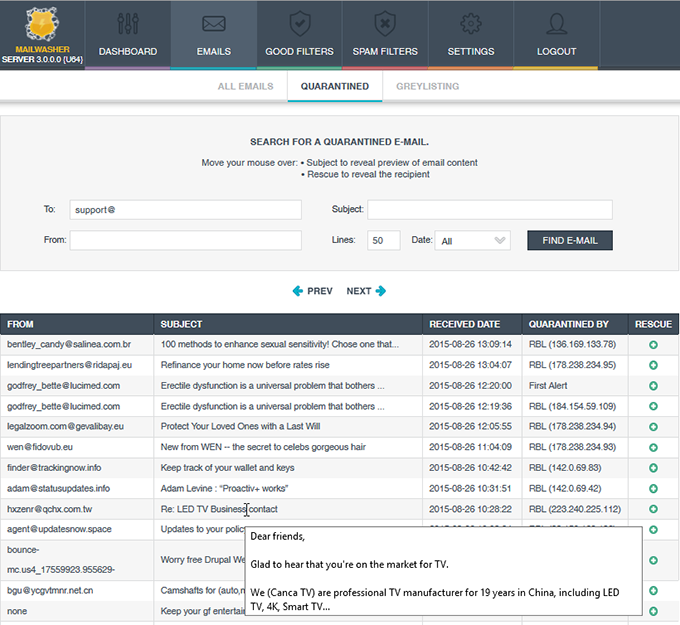
If a user finds an email which they want to rescue, they click the 'rescue' link and that email is delivered to their inbox. If the mouse hovers over the link, it will show who the rescued email will be sent to.
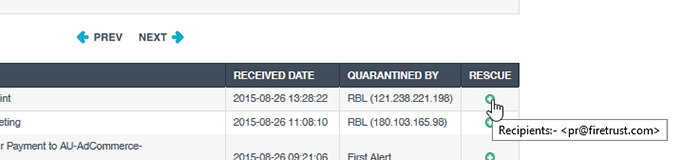
When an email is rescued, the senders email address is automatically added to the friendlist so it is not blocked in the future and the rescued email is delivered to the users inbox.
The rescued email is shown in green in the quarantine screen for easy reference.

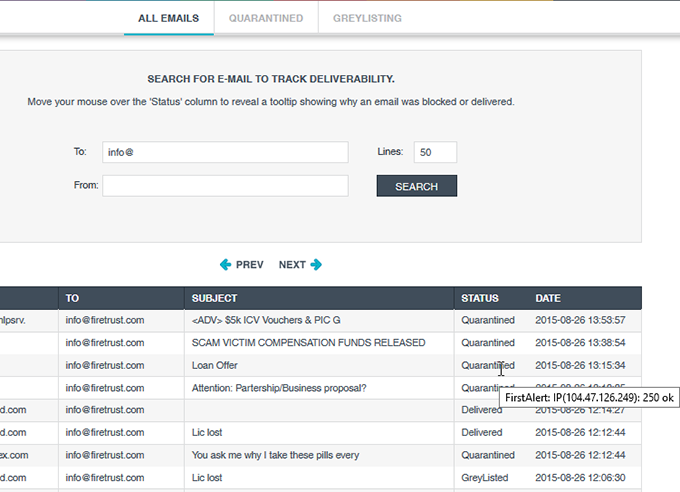
All Emails Screen
The All Emails screen shows all emails received by MWES. Users can search for an email to see if it was delivered or otherwise. Moving the mouse over the Status column items shows the reason for Quarantine, Delivery or otherwise.
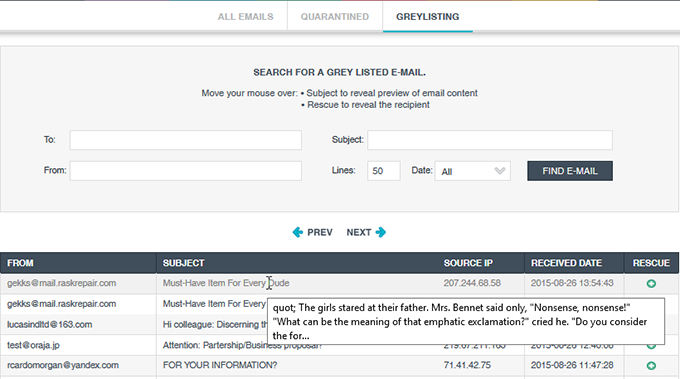
Greylisting - Greylisting is an effective tool to stop spam by sending a temporary fail back to the sender of the message. If the sender is sent via a valid MTA, the message is re-sent and MWES will let it through.
If the message is not sent from a valid MTA it is not delivered and left in the MWES greylisting quarantine area.
Greylisting is enabled by default in Settings >> Filters >> Settings
NOTE: Valid messages can be delayed by up to 15 minutes using this method since the sending MTA has to re-send the message. You can always check the Email >> Quarantine area to see which messages are due to be resent, and thus rescue them in which case they will be added to an internal IP Whitelist. See below, the light grey message at the top is within the 15 minute time period to be re-sent. Once an email senders email has been delivered once, they are let through instantly the next time they send an email.
NOTE: Enable SPF (Settings >> General), so email is checked against SPF records and if matched successfully it bypasses greylisting.
Users can move their mouse over the subject line to view the body (first 200 characters by default - preview length can be changed in Settings >> General)
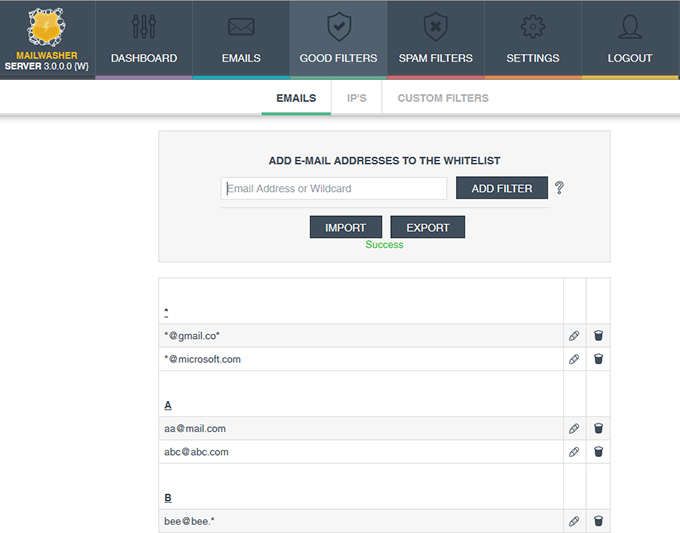
Email Whitelist - You can setup a whitelist which will allow any email address on the whitelist to bypass all the spam filters.
Note: You don't need to add your email address or domain to the whitelist, as MWES will detect that you're working from a local LAN. Spammers frequently use your own email address to bypass filters, so leave your company email addresses off the whitelist.
Note: You can also use wildcards * and ? ? will match any one character and * will match zero or more unknown characters.
E.g. w?lly@hotmail.* will match: willy@hotmail.com,wally@hotmail.co.uk and wally@hotmail.com
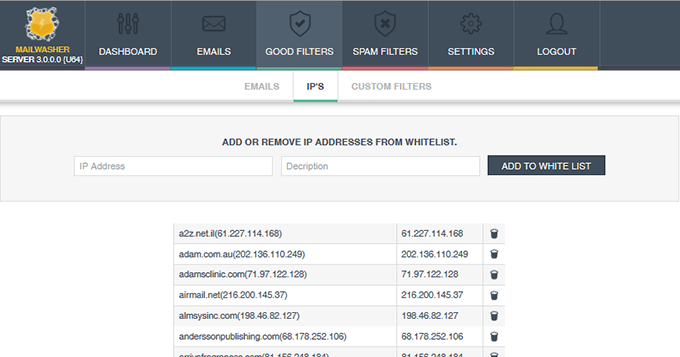
IP Whitelist
The IP Whitelist is automatically populated by the greylisting feature when an email is rescued. In this case the domain and IP address is added so those emails are let through automatically next time.
Alternatively you can add your own. IP ranges can be expressed in CIDR notation.
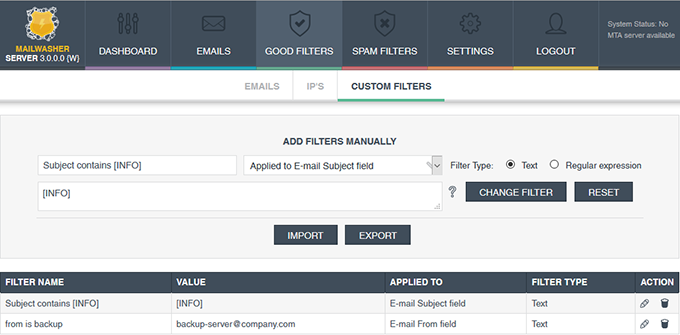
Custom Filters
You can setup a custom filter for good email, so for example, email matched against a particular subject line will bypass the spam filters.
Filters can be either plain text or regular expressions (regular expressions syntax from Regex lab)
When filtering multiple values:
To use OR operator, choose ‘Reg. expression’ and separate each filter value with a pipe e.g.
one|two|three|four
to use AND separate each filter value on a new line. e.g.
One
Two
Three
Four
Email Blacklist - You can setup a blacklist which will stop any email with that blacklisted email address from passing to end users inboxes.
Note: You can also use wildcards * and ?
? will match any one character and * will match zero or more unknown characters.
E.g. w?lly@hotmail.* will match: willy@hotmail.com,wally@hotmail.co.uk and wally@hotmail.com
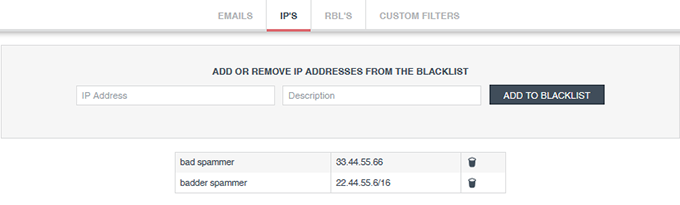
IP Blacklist
You can add IP addresses to the IP blacklist which will stop any email with that blacklisted IP address from passing to end users inboxes. IP ranges can be expressed in CIDR notation.
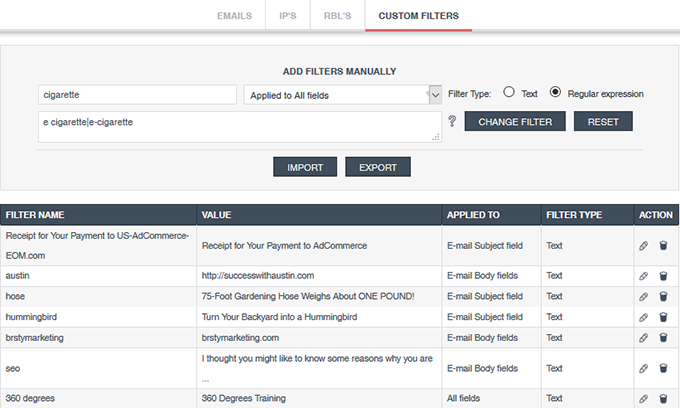
Custom Filters -
You can setup a custom filter for blocking spam email, so for example, email with a matched subject line will be caught and quarantined.
Filters can be either plain text or regular expressions (regular expressions syntax from Regex lab)
When filtering multiple values:
To use OR operator, choose ‘Reg. expression’ and separate each filter value with a pipe e.g.
one|two|three|four
to use AND separate each filter value on a new line. e.g.
One
Two
Three
Four
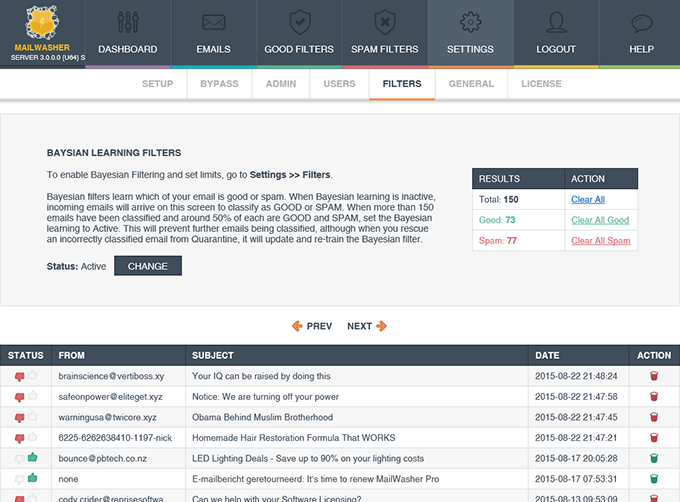
Bayesian filters learn the difference between your good email and spam email and become very accurate after a brief period of training.
After enabling the Bayesian Filter (Settings>>Filters>>Settings) and setting the amount of email to train, incoming email is collected in the Bayesian screen (Settings>>Filters>>Bayesian Training). On this Bayesian Training screen, once you have the recommended number of email listed, you mark email as good (thumbs up) or spam (thumbs down). Ideally you want around 50% spam and 50% good email.
When you are ready to use the bayesian filters, click the CHANGE button to make the filters active. The incoming email collected to the Bayesian Training screen will stop and the bayesian filters will start classifying your incoming email.
Note 1 -You may wish to disable bounce/undeliverable notifications (Settings>>General) as some false positives are likely at the beginning of bayesian training.
Note 2 -Rescuing an email from Quarantine will add the email to the Bayesian Training screen as a good email and update the bayesian filters.
Note 3 -You may wish to enable Spam Reporting (Settings>>General) as any spam reported will update the bayesian filters. Spam Reporting appends a spam reporting link to all non-whitelisted incoming email.
Note 4 -You may wish to add legitimate email addresses to the whitelist to avoid the bayesian filter entirely. That way the bayesian filter will only need to be trained on outlying legitimate emails.
Enabling the Bayesian Filter and setting a limit on the training corpus
Recommended number of emails to train bayesian is
40 - 100 for a site with a small amount of incoming email.
100 - 200 for a medium sized site
200 - 400 for a large site

List of emails used for training
You can see the thumbs up (good) and thumbs down (spam) icons used to classify email for training.
Reporting spam by users is helpful in that it helps train the Bayesian Filters so they're kept up to date.
Users' incoming non-whitelisted email will contain a 'Report Spam' link which they can click to report an email as spam. This link will be either embeded in the body of the email, or as an attachment (Microsoft Outlook always converts it to an attachment).
Report Spam can be enabled in Settings >> General
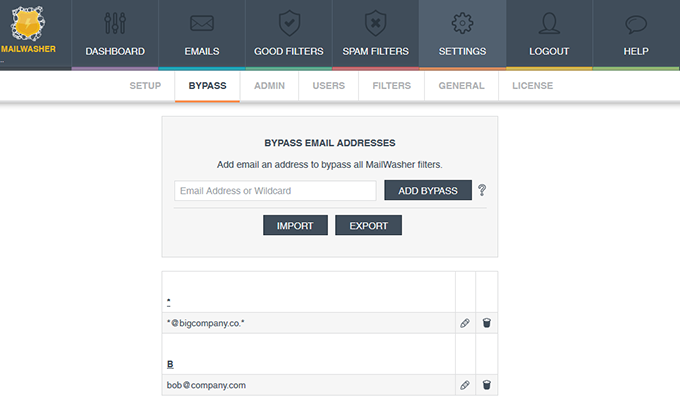
Bypass email addresses - Email addresses and domains can be added to bypass all MWES filtering and be delivered straight to the MTA.
Note: You can also use wildcards * and ? ? will match any one character and * will match zero or more unknown characters.
E.g. w?lly@hotmail.* will match: willy@hotmail.com,wally@hotmail.co.uk and wally@hotmail.com
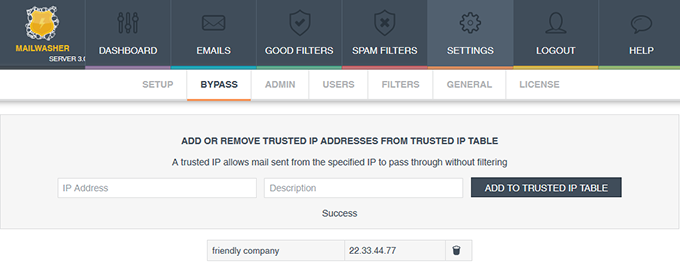
Trusted IP's
A trusted IP allows mail sent from the specified IP to pass through MWES without filtering.
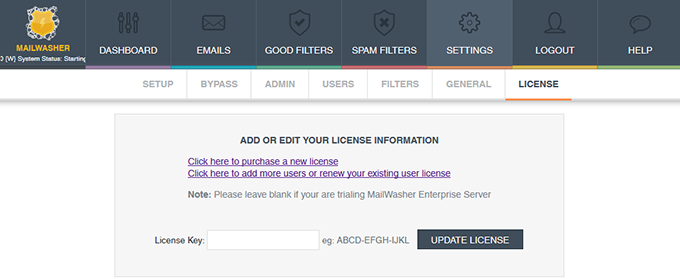
After the 30 day free trial is finished, if you want to keep MWES you must purchase a user license appropriate for the number of users you have.
Once you have purchased the license you will be sent a 12 digit license key. Enter these details in to the Settings>>Product License screen to continue using MWES.
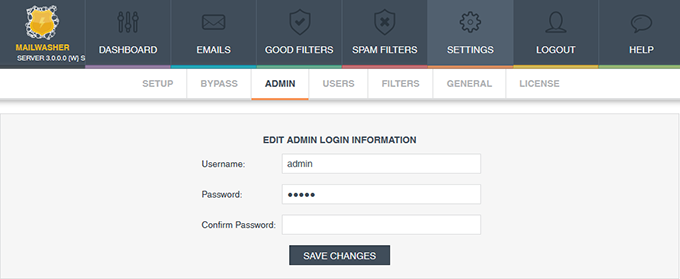
The Admin Details screen is used for the administrator to change their username and password to access the software.
Copyright © Firetrust Ltd Established 2000


